
Acrylic distemper paint is an economical yet quality option for interior walls. The global paint market is expected to reach $235 billion by 2029, with water-based paints leading due to their eco-friendliness. Compared to traditional distemper, acrylic distemper offers better durability, a smooth matte finish, and easy application. This guide covers its benefits, uses, and application tips, helping homeowners and businesses choose the right paint for their needs.
What is Acrylic Distemper Paint?
Acrylic distemper paint is a kind of wall paint that uses acrylic polymers to allow it to adhere to a cooler. It is just a more improved version that’s better quality but still within the same range of distemper costs. It is also easy to apply and clean, as the paint contains colour pigments, acrylic binders, and water. It dries quickly, usually in 2-4 hours, and permits walls to breathe, helping to prevent moisture buildup.
Acrylic distemper is superior to basic cement paint but cheaper than a high-end emulsion. It comes in pre-mixed colours, has a smooth matte finish and emits a low odour with fewer harmful chemicals than oil-based distemper paints.

Benefits of Acrylic Distemper Paint
Acrylic distemper paint offers numerous advantages for interior applications:
| Benefit | Description |
| Cost-Effectiveness | Provides better quality than traditional distempers at a price point below premium emulsion |
| Improved Durability | Lasts longer than conventional distempers, typically 3-5 years with proper application |
| Better Washability | Offers limited washability, allowing for occasional cleaning of light stains |
| Enhanced Adhesion | Bonds more effectively to various surfaces including plaster, cement, and previously painted walls |
| Faster Drying | Dries quicker than oil-bound alternatives, allowing for faster project completion |
| Lower Odor | Produces minimal smell during application and drying, improving comfort during painting |
| Environmental Friendliness | Contains fewer VOCs than oil-based products, creating healthier indoor environments |
| Color Stability | Resists yellowing and maintains color better than traditional distempers |
The paint gives a smooth and even finish and makes surface imperfections less visible. The matte look suits various interior design settings. It’s easy to touch up, making for a uniform appearance over time.
Acrylic distemper provides good coverage, often requiring fewer coats than traditional distempers. This coverage efficiency saves both time and material costs during application. The paint offers moderate resistance to common household stains, though it cannot withstand vigorous scrubbing.
Application of Acrylic Distemper Paint
Acrylic distemper paint has many different interior uses. It works best on interior walls and ceilings in habitable spaces and is a low-cost option for bedrooms, living rooms, and corridors. The paint is very soft to the touch and has good light diffusion properties.
Common application areas include:
- Residential interior walls and ceilings
- Rental properties requiring economical yet durable finishes
- Commercial spaces with moderate traffic
- Educational institutions and office environments
- Community centres and public buildings with budget constraints
- Renovation projects where cost control remains important
This paint is suitable for use on varnished wood, plaster, concrete, brick, and old wall paint, provided it is correctly prepared. It is highly effective when applied as recommended by the manufacturer to new or existing surfaces. The formulation works effectively on properly primed drywall, creating a uniform appearance.
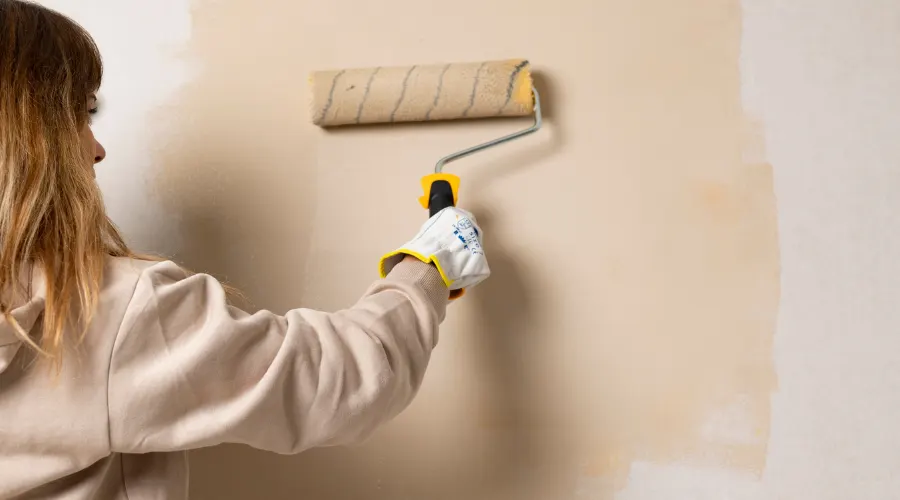
How to Apply Acrylic Distemper Paint (Step-by-Step Guide)
Proper application ensures optimal performance and appearance of acrylic distemper paint:
- Surface Preparation
Clean the surface by removing dust, dirt, and loose particles. Repair cracks and holes with appropriate fillers. Sand-repaired areas are smooth when dry. Make sure the surface is fully dry before moving further. Treat any mould or mildew with proper solutions.
- Priming the Surface
Apply a water-based primer suitable for acrylic distemper. Use a primer-sealer on highly absorbent surfaces. Allow the primer to dry completely (typically 2-4 hours). Inspect for complete coverage and apply a primer second coat if needed. Sand lightly, if necessary, to ensure a smooth base.
- Paint Preparation
Stir the paint thoroughly before use. Make it thin according to manufacturer specifications (typically 15-20% water). Mix well to achieve a consistent texture. Prepare sufficient quantities for a complete application. Strain the paint, if necessary, to remove any lumps.
- First Coat Application
Use a quality medium-nap roller for large areas. Apply with brushes for edges and corners. Keep a wet edge while painting to avoid streaks or uneven lines. Apply with consistent pressure in overlapping strokes. Let it dry fully, which usually takes 2-4 hours.
- Second Coat Application
Inspect the first coat for uniform coverage. Apply a second coat using the same technique. Cross-roll the final coat for a uniform appearance. Ensure complete coverage of all areas. Allow 24 hours for full curing before normal use
- Cleanup and Maintenance
Clean tools immediately with water. Store leftover paint in sealed containers. Wait at least two weeks before attempting to clean the surface. Use gentle cleaning methods when necessary. Touch up any damaged areas promptly
Factors to Consider Before Buying Acrylic Distemper Paint
Several important factors influence the selection of acrylic distemper paint:
- Quality and Brand Reputation
Established manufacturers typically offer better formulations with consistent performance. Research brands with proven track records in the market. Quality products deliver better coverage and durability despite slightly higher costs.
- Colour Selection and Stability
Evaluate the available colour options and consider how they will appear in your specific lighting conditions. Assess the colour stability based on manufacturer claims and independent reviews. Request sample swatches when possible to verify colours in your space.
- Coverage Rate
Check the manufacturer’s specifications for coverage per litre or gallon. Better coverage rates reduce the total amount of paint required for the project. Consider this factor when comparing costs between different products.
- Drying Time
Verify the drying time between coats and the full curing time. Faster drying formulations allow quicker project completion. Consider your climate conditions, as humidity and temperature affect drying times.
- Washability and Durability
Assess the paint’s resistance to cleaning and wear. Higher-quality acrylic distempers offer better washability and longer service life. Consider your space’s specific requirements when evaluating this factor.
- Environmental Considerations
Check VOC content and other environmental certifications. Lower VOC formulations create healthier indoor environments. Consider these factors, particularly for sensitive individuals or enclosed spaces.
- Price and Value
Compare costs across brands while considering quality differences. Calculate the total project cost, including preparation materials and application tools. Evaluate the long-term value rather than focusing solely on the initial purchase price.
- Warranty and Support
Review manufacturer warranties and technical support options. Better warranties often indicate manufacturer confidence in their product. Consider the availability of technical assistance for application questions or issues.
Conclusion
Acrylic distemper paint provides a good balance between performance and price for use indoors. It is better than traditional distempers in terms of improved durability, faster drying time, and better finish quality. The paint serves well in residential and commercial spaces where budget considerations remain important. You need to apply the correct techniques for the best and long-lasting results. This variety of coating has come a long way since its introduction. It continues to be a practical alternative for property owners who seek to use a satisfactory interior surface that is as economical as it is smart.