Bricks are the most commonly used construction materials that give the necessary strength and durability to the structure. There are various types of bricks in construction; however, the quality of the bricks is a concern, no matter what brick is being chosen. The first-class bricks earn a wide range of attention and preference, but the second-class bricks often go underrated. Here in this blog, we are going to take a look at the second-class bricks and everything you need to know about them.
What are Second Class Bricks?
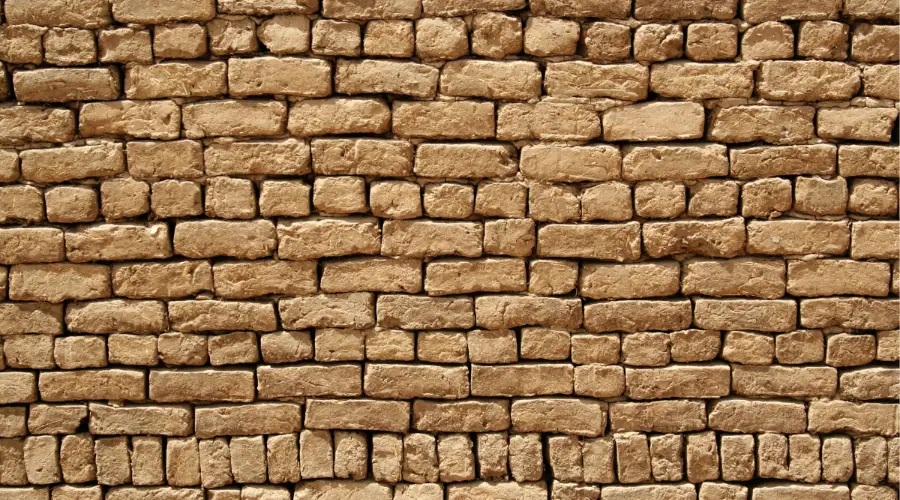
Second-class bricks are slightly over-burnt clay bricks. These bricks are ground-moulded and have irregular edges. They are inferior to first-class bricks and are used in both important and unimportant masonry structures.
Characteristics of Second-Class Bricks
- These bricks are slightly overburnt in the burning kiln.
- They are rectangular and have irregular edges, and the surfaces may be slightly uneven.
- They might have slight flaws and chips on the surface, but are free from lime and kankar nodes.
- They don’t have any efflorescence on the surface of the brick, even in wet weather conditions.
- These bricks are slightly red and have uniform colour throughout the structure.
- The surface texture of the second-class bricks is rough and uneven.
Properties of Second-Class Bricks
Water Absorption
These bricks, when immersed in water for 24 hours, will absorb water up to 22%. Since these bricks have a higher water absorption ratio, they are not suitable for construction in water-prone and wet areas.
Crushing Strength
These bricks are strong and brittle, but they have a minimum crushing strength of 70 kg/cm². The lower crushing strength makes them unsuitable for high-load-bearing structures.
Compression Strength
The minimum compressive strength of the second-class brick is between 7 N/mm² to 7.5 N/mm². These bricks can be used for medium-load-bearing structures.
Impact
These bricks, when struck together or when struck with a hammer, produce a metallic sound.
Abrasion
These bricks, when scratched with fingernails, do not form any marks on the surface, proving the high-abrasion resistance, similar to the first-class bricks.
Efflorescence
These bricks, when immersed in water, do not form any white layer on the surface, marking the low efflorescence rate in both wet and dry states.
Advantages & Disadvantages of Second-Class Bricks
Advantages
- These bricks are cost-effective and economical when compared to first-class clay bricks.
- They are suitable for one-storeyed load-bearing buildings.
- These bricks, after plastering, can be used for permanent structures.
Disadvantages
- These bricks have a rough and uneven finish that requires plastering of the building for a smooth finish.
- The manufacturing process of these bricks consumes a lot of natural resources and pollutes the air.
- These bricks are heavyweight.
- They have a high water absorption ratio, thus making them unsuitable for water-prone areas and exposed structures.
- They produce waste during manufacturing and masonry work.
Quality Standards for Second-Class Bricks
The second-class bricks should possess the following quality standards:
- The compressive strength of the bricks should not be less than 7 N/mm².
- The colour of the second-class brick should be either yellow or light red and should be uniform throughout the brick.
- These bricks containing marks of slight overburning are acceptable.
- The bricks should be rectangular in shape, but they have uneven edges and surfaces.
- These bricks, when struck with a hammer, should produce a metallic sound.
- They should be free from efflorescence in all weather conditions.
- They should not absorb more than 22% of water when immersed in water for 24 hours.
Manufacturing Process of Second-Class Bricks

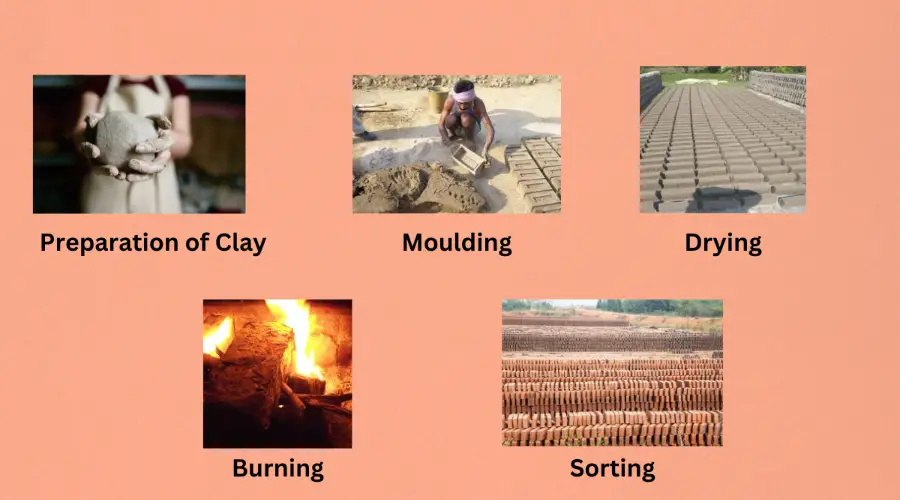
The manufacturing process of second-class bricks is similar to that of burnt-clay bricks.
Preparation of Clay
The upper surface of the soil is removed up to a depth of 200 mm to eliminate impurities and other earthy particles. The clay is then excavated and heaped above the ground surface. The stones, pebbles, and other vegetable matter from the collected clay are removed using a filtering screen. The filtered clay is mixed with aggregates (sand and straw) to improve the quality of the brick.
The blended clay mix is then spread out under direct sunlight for several weeks to months to get seasoned under natural weather conditions. This allows the brick to develop plasticity and durable properties. After weathering, an adequate amount of water is added and the mix is kneaded with the help of labour or cattle two to three times and battered with shovels to make it a homogenous mix that is ready for moulding.
Moulding
The prepared clay is then transferred into a ground or table mould and compressed to remove pore gaps and make it dense. The table or ground moulding is the reason behind the uneven finish of the bricks.
Drying
The moulded clay bricks are arranged and kept under direct sunlight for 3 to 10 days for natural drying, depending on the climatic conditions.
Burning
After natural drying, the bricks are burnt in fire kilns at a temperature of 1100℃ for 10 to 40 hours to attain maximum strength and durability.
Sorting
The burnt bricks are then sorted based on the classes, where the bricks that are slightly overburnt and have uneven edges are separated as Class B or second-class bricks.
How to Identify Second-Class Bricks?

The second-class bricks can be identified using the following characteristics:
- Irregular shape
- Rough surface
- Small distortions or cracks
- Marks of slight overburning
- Lack of sharp edges
- Do not break when dropped from a height of 1m.
- Do not leave any marks when scratched with fingernails.
- Produce a metallic sound when struck.
Conclusion
The second-class bricks are slightly less superior compared to first-class clay bricks. They are made similar to all kinds of fire-burnt clay bricks, however, the moulding and burning process affects the quality of these bricks. They possess good compressive strength, which means they can be used for constructing both load-bearing and non-load-bearing structures; however, they are not suitable for exposed structures. Nevertheless, when properly plastered, they can be used for exposed walls and permanent structures.

